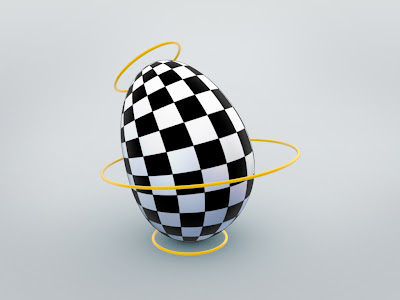
 One of the most fundamental (and important) rules in animation is the use of squash and stretch which is used to give the illusion of weight and volume as an object moves.
Open the scene Ball_Rig.scn. Select the Ball and from the Get > Primitive menu choose Lattice. In the Lattice PPG, change the Subdivision on all three axis’s to 2 and close the PPG. With the Lattice still selected, press [T] to set the selection filter to points and select the top nine points on the lattice. From the Main Command Panel (MCP) > Edit menu choose Create Cluster with Centre. This creates a null object and automatically constrains the selected points to that null, meaning that if you move (or scale) the null the corresponding part of the lattice will move as well. Select the Null and name it Lattice_Cns_Top. Repeat the procedure for the middle and bottom points so you have one null controlling the top, one controlling the middle (name it Lattice_Cns_Center) and one the bottom (name it Lattice_Cns_bottom) part of the lattice.
From the Get > Primitive > Curve menu choose Circle. Name it Squash_Bottom and set the Radius to 2. Rotate the circle -90 degrees along the X-axis and then from the MCP >Transform menu click Freeze Rotation. Duplicate the curve and position it at the centre of the ball (Y:4) and increase the radius to 6 so it extends the edge of ball. Change its name to Squash_Center. Duplicate the bottom curve again, position it at the top of the Ball (Y:8) and change the name to Squash_Top.
Select the Lattice_Cns_Top null and click the Parent button in the MCP. With the middle mouse button, select the Squash_Top curve to make it the parent of the null. Right click to end the picking session. Make the Squash_Center parent of the Lattice_Cns_Center null and the Squash_Bottom parent of the Lattice_Cns_bottom null.
It’s important to remember that the object’s volume is constant and does not change no mater how far you squash or stretch it. As you move the Squash_Top and Squash_Bottom curves closer together the Ball squashes vertically which means you’ll have to compensate the loss of volume by expanding (scaling) it horizontally by the same amount. The diameter of the Ball is 8 units, so when the distance between the top and Bottom curves are 8 units it’s in its “default state” and the scaling should remain at 1. By dividing the distance between the top and bottom curves by the diameter of the ball, you’ll calculate the scaling factor.
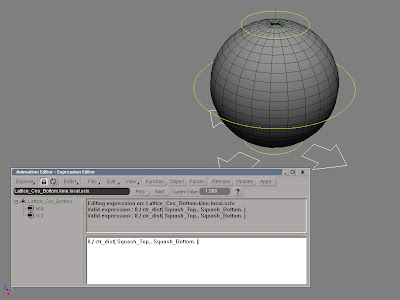
Select the null named Lattice_Cns_Top and press [Ctrl]+[K] to open its Local Transform PPG. Right click the animation icon (green divot) next to the X Scaling and choose Set Expression… from the popup menu. In the editing pane of the Expression Editor enter:
8 / ctr_dist( Squash_Top., Squash_Bottom. )
Click the Apply button to apply the expression and close the PPG. You’ll need to apply the same expression to the scaling on the Z axis as well. To copy the animation, right click on the animation icon and choose Copy Animation from the menu. Then right click on the animation icon for the Z axis and choose Paste Animation. Open the Local Transform PPG for the Lattice_Cns_Center and Lattice_Cns_Bottom and paste the animation to their respective X and Z axis.
The project files used in this tutorial can be found at:http://dl.dropbox.com/u/3834689/CaffeineAbuse/Squash_and_stretch.zip
 Using a lattice with an extra subdivision in the middle of the sphere enables you to change the object’s center of mass in addition to the overall squash and stretch.
Quick tip
The curves should only be used to control the squash and stretch action and not actually move or translate the ball. To do so, create another curve and make it the parent of all the other objects, including the Ball.


2 comments:
Thank you for this awesome tip, its a very simple rig. While the translation of the rig is very straight forward, I've come into an issue when it comes to scaling. My objects behave erratically when I scale the root null. I there a typical workflow that will allow the rig to scale?
Hi Jonathan,
As a general rule, you shouldn’t scale your rigs. There are many reason for this, and I believe you’ve encountered one of them. The reason the rig doesn’t work as expected after you scaled it is because the expression used in the rig uses the distance between the cluster centers when the scaling is 1. If you scale the entire rig by a factor of 2 the distance between the top and bottom of the lattice is no longer 8 units, but 16 units. So you need to change the first part of your expression, for example 8 / ctr_dist( Squash_Top.kine.global.pos, Squash_Bottom.kine.global.pos ) to 16 / ctr_dist( Squash_Top.kine.global.pos, Squash_Bottom.kine.global.pos )
Cheers
O
Post a Comment