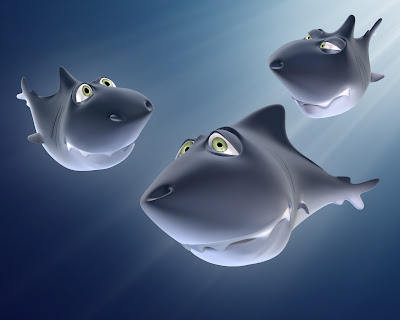
It only takes between 90 seconds and four minutes from the moment you meet a new person to decide whether you fancy him/her or not. Though it’s natural to think that this decision above all is based on the verbal communication, it’s in fact very much the opposite. What the person is actually saying only accounts for seven per cent of your impression. The tone, rhythm and inflection accounts for another thirty-eight per cent, which mean that the remaining fifty-five per cent comes solitary from the body language; in which the eyes plays a very vital part. In addition, you only make eye contact in about 20 per cent of the time while talking to a person, so during the other 80 per cent your eyes will be doing something else. And no, we’re not talking about where teenage boys are looking when chatting with a pretty girl.
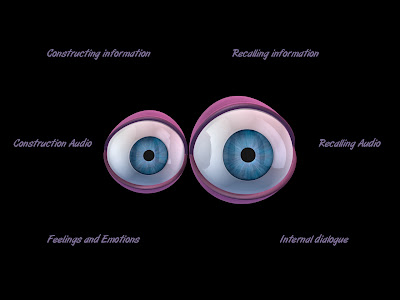
The eyes are very rarely still. In addition to inspecting the actual object/person in various patterns they flicker around, reflecting on what is said, thought, heard and felt. While these movements are very rapid and even subtle, they are very much present. When recalling information or past experiences we look to the left whereas when creating or making things up we look to the right. If you for example are trying to find inspiration or ideas for the hip project you’re currently working on you will look upwards, which is visual area. Then you start thinking about the great party you’ll be missing during the weekend because of the same project and that makes sad and you will look down, which is the emotional area. Right in the middle is the auditory area. So when you’re trying to form a sentence (in which you plea to get the Saturday off) you’ll look to the right but if you’re recalling a past conversation (I won’t even repeat what the project manager said the last time) you’ll look to the left. Naturally there’s a whole lot more to it than this, just as there’s a whole lot more to a successful cartoonish eye rig and animation that just hitting one or two good exaggerated shapes for the eyes.
At its most simplistic state, your rig must be able to do four things. Just as a real eye, you need to be able to look in different directions, change the size of the pupil as it reacts to the surrounding illumination and the characters emotions and avoid getting completely dried out by enabling it to blink. Since it’s a cartoon eye you certainly need to be able deform it into all sorts of interesting shapes. And naturally, you’ll need to be able to do all things simultaneously.
The project files used in this tutorial can be found at:
http://www.Redi-Vivus.com/Caffeineabuse/Pixar_Rigging_Eyes.zip
STAGE ONE The right look
Step 01
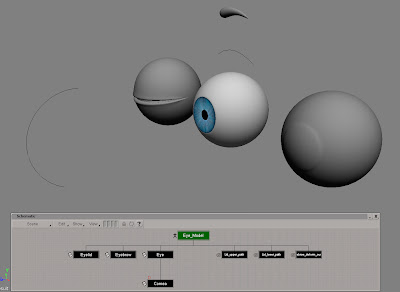
Start by opening the scene eye.scn from this issues CD. Apart from a couple of null objects, the scene contains all the objects needed (though several of them are hidden to avoid cluttering the viewports) to complete the following steps. For obvious reasons you’ll only deal with one eye during the walkthrough. Once completed, you can simply duplicate it and you’ll have a fresh pair of eyes.
Step 02
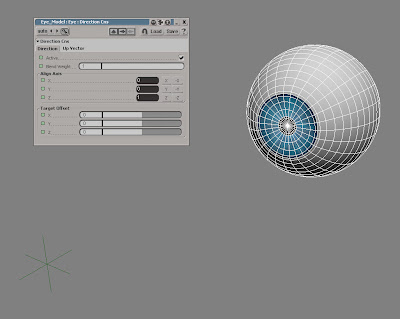
To control where the eye is looking, you’ll use separate object and constrain the orientation of the eye. From the Get > Primitive menu choose Null. Name it look_at and move it along the Z-axis so it’s well in front of the eye. Select the eye, click the Constrain button in the Main command panel (MCP) and choose Direction. In the Direction Constraint PPG, click the Z button in the Align Axis section to align the orientation of the eye.
Step 03
How and where you’re character is looking is essential not only to express different emotions, as discussed on the previous page, but is one of the key ingredients in bringing him or her to life. Make sure your character is focusing on something. It doesn’t matter if it’s an emotion or an actual object or if it’s on or off screen, just don’t’ leave him staring at nowhere completely without any movement.
STAGE TWO The pupil
Step 04
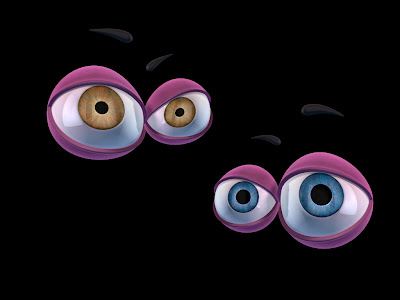
Lighting conditions and alcoholic beverage aren’t the only things that affect the size of the pupils. A cute and cuddly character will have big pupils but one that’s evil will have really small. In addition, if your character for example is looking at someone or something he fancies his pupils will dilate. If he on the other hand is looking at something he dislikes, they’ll contract.

Step 05
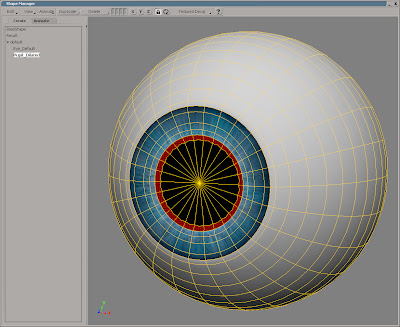
Press[2] to switch to the Animate toolbar. Select the eye and from the Deform > Shape menu choose Shape Manager... Change the display type to Shaded to get a clearer view of the object. Select the shape named Shape in the shape list and rename it to Eye_Default. With the shape still selected, press the Duplicate button and rename the new shape to Pupil_ Dilated.
Step 06
Zoom in on the pupil and press [U] to switch to Raycast Polygon mode. Select the polygon loop at edge of the iris/pupil. Press [X] to activate the Scale tool and scale the polygons till the pupil is vastly larger. Note that you also may need to scale some of the adjacent points on the iris (so they don’t intersect) if you want to go really big with the pupil. Switch to the Animate tab and drag the slider to try the animation.
STAGE THREE In the blink of an eye
Step 07
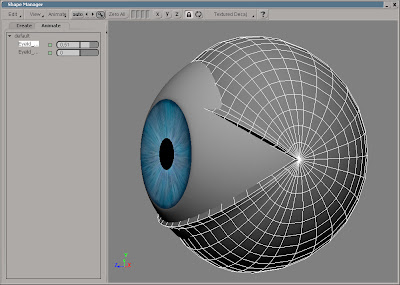
It’s logical the assume that creating the blink would be a rather quick and easy thing to setup with two different shapes, one with the eyelids open and one with them closed. However, shape animation in XSI are interpolated in a linear fashion, which in this case mean that the eyelid would go straight trough the eye white instead of gradually covering the eye.
Step 08
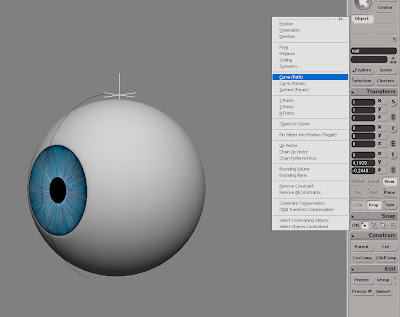
So, you’ll need use a slightly different approach. Press [8] to open an Explorer. Select the Lid_upper_path and the Lid_lower_path curves and press [H] to unhide them. Create a new Null object and name it Lid_upper_null1. With the null still selected, click the Constrain button in the MCP and choose Curve(Path). Pick the Lid_upper_path curve when prompted.
Step 09
Press [Ctrl] + [D] four times to duplicate the null object and then select all five null objects. In the Path Constraint PPG, switch to the Tangency tab and check the Active checkbox. Switch back to the Path tab and enter L(100) in the Path %age text box. This will distribute the null objects evenly along the curve (this is merely to demonstrate what you’ll be doing in the next steps).
Step 10
The idea is to create a relation between the nulls, so when you move the one at the end the others will automatically contract. Select the Lid_upper_null4 object (the second from the end of the curve). In the Path constraint PPG, right click on the animation icon next to the Path %age and choose Expression Editor… from the menu. In the Expression Editors editing pane, enter Lid_upper_null5.kine.pathcns.perc*0.75 and click the Apply button in the command bar.
Step 11
Select Lid_upper_null3, right click on the animation icon for the Path %age and choose Expression Editor… from the menu. Enter Lid_upper_null5.kine.pathcns.perc*0.5 and click the Apply button. Select Lid_upper_null2, repeat the previous steps and enter Lid_upper_null5.kine.pathcns.perc*0.25 in the editing pane. The last null will be used to smooth out the deformation on the eyelid, so leave it as it is.
Step 12
Create a new Null object, name it Lid_lower_null1 and path constrain it to the Lid_lower_path curve. Duplicate it three times (so there are four in total). Select the Lid_lower_null3 and apply the expression Lid_lower_null4.kine.pathcns.perc*0.66. Select the Lid_lower_null2 and apply Lid_lower_null4.kine.pathcns.perc*0.33. Now, whenever you change the Path %age for Lid_upper_null5 or Lid_lower_null4 the other will automatically follow.
STAGE FOUR Attaching the eyelids to the nulls
Step 13
Press [8] to open an Explorer, select the Eyelid and press [H] to unhide it. From the Deform > Envelope menu choose Set Envelope. Press Yes when asked about the construction mode and select the nine null objects. Right click to end the picking session. In the Automatic Envelope Assignment PPG, change the Number of Skeleton Objects to 1.
Step 14
To see the effect of your weight editing, it’s a good idea to temporarily test moving the two nulls in charge of the deformation. Select the Lid_upper_null5 and Lid_lower_null4 and press the Selection button in the MCP. In the tree, expand the Kinematics > Constraints and click the icon in front of PathCns to open the PPG. Click the Lock icon to lock it in place. Now, simply drag the Path %age slider to blink the eye.
Step 15
The result isn’t half bad but it does need a bit of smoothing. However, you don’t want to smooth the weights on the entire object as this would produce undesired deformation in the corner of the eyelids. Select the eye and press [T]. Select all the points as shown in the above screenshot and from the Deform > Envelope menu choose Smooth Envelope Weights. Leave the values in the Smooth Envelope Weight PPG as they are and close it.
STAGE FIVE Deforming the eye
Step 16
Change the construction mode to Animation. By choosing in which mode you apply the different operators you can control in which order they are evaluated. By evaluating the blink before deforming the objects, you’ll make sure the entire lids stays outside the eye throughout the animation and align at the end of the blink. Select the Eye, the Eyelid and the Cornea.
Step 17
From the Get > Primitive menu choose Lattice. Set the X, Y and Z Subdivisions to 2. Close the PPG and open the Shape Manager. To see how the lattice is actually affecting the objects you’ll need to change a few settings. In the View menu, check the Display All Objects. In the Display Type menu, choose Display Options… Switch to the Display Mode tab and change the Construction History to Result (top).
Step 18
Select the default shape in the shape list and duplicate it. Name the shape Sad. In the Shape view, make sure the lattice is still selected, press [T] and move the points so the shape of the lattice resembles the above screenshot. Select the default shape in the shape list again and create three more duplicates. Name them Mad, Surprised and Relaxed and modify the respective shape to roughly match the screenshot in step19.
STAGE SIX Creating a custom control panel
Step 19
Switch to the Animate tab and play with the shapes and sliders to how well they play together. All the properties, shapes and operators that you’ll need to control the eye is currently scattered all over the scene, which isn’t very intuitive. Instead you can make use of Custom Parameter Sets, which essentially will function as a control panel for your eye.
Step 20
From the Create > Parameter menu choose New Custom Parameter Set and name it Eye_Control. Open an Explorer and select the Eye_Control node. Press [Shift] + [P] to add a new Custom Parameter. Enter Pupil_Dilation in the Parameter Name text box and press Ok. Create another six custom parameters and name them, Eyelid_Upper, Eyelid_Lower, Relaxed, Sad, Mad and Surprised.
Step 21
Press [Alt] + [0] to open the Animation Mixer (AM), and double-click on the Shape_ClusterClip to open it. Right click on the animation icon for the Sad_Clip and chose Expression Editor… Enter Eye_Model.Eye_Control.Sad in the Edit pane and click Apply. Repeat for the other three shapes. Click the Up button in the command bar of the AM. Double click on the next Shape_ClusterClip and enter Eye_Model.Eye_Control_Pupil_Dilation as an expression to the Pupil_Dilated_Clip.
Step 22
Open both the Path Constraint PPG for the Lid_lower_null4 and the Eye_Control PPG and click the Lock icons to keep them open. The eyelid requires a slightly different solution that the shape clips because you don’t want the sliders to just equal each other. Press [Alt] while dragging and dropping the animation icon for the Lower_Eyelid on to the animation icon of Path %age. This links the Path %age parameter to the Lower_Eyelid.
Step 23
Set the Lower_Eyelid to 0 (zero) and the Path %age to 30. Right click on the Path %age animation icon and choose Set Relative Values. Set the Lower_Eyelid to 100 and the Path %age to 100 and choose Set Relative Values again. Link the Path %age parameter for the Lid_upper_null5 to the Upper_Eyelid the same way.

Step 24
After playing a bit with the eye, trying to express different emotions and states of mind, you’ve probably noticed that you could really make use of a few more shapes. So return to the Shape Manager and once you’re happy with the shape library, it’s time to move on to the eyebrow. The eyebrow also plays an important part in creating strong expressions. Convenient enough, there’s an eyebrow included in the scene. The eyebrow is already deformed by a curve, so all you have to do is to create a couple of shapes for the curve, and connect their clips in the animation mixer to the custom parameter set in the same way as you did with the lattice.
Quick tip
Change the name of the custom property set to DisplayInfo_Eye_Control and activate Show Custom “DisplayInfo” Parameters in the Stats tab of the Visibility options in the camera viewport. The parameters are now available directly in the viewport.
 I know i'm a but late with the holyday greetings, but I do have to work as well =) Nevertheless, I hope you’ve had a Merry Christmas and will have wonderful New Year!


