 Step 1
The snow surface
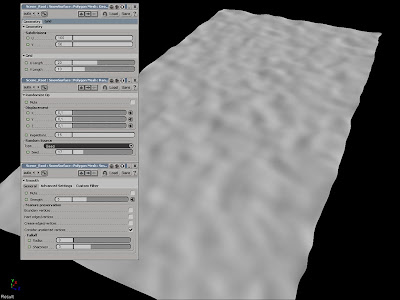
From the Get > Primitive > Polygon Mesh menu chose Grid. In the PPG set the U Length to 20, the V Length to 10 and change the U Subdivisions to 100 and the V to 50. Next, add a Randomize operator from the Modify > Deform menu. In the PPG, set the X,Y and Z Displacement 0.1 and the Repetitions to 15. From the Modify > Deform menu, chose Smooth. In the PPG, set the Strength to 5. Step 2
Adding a texturemap
Now, from the Get > Property > Texture Map menu chose Texture Map. Click the New button to load a new Clip and chose the lt_foot.pic sequence from this issues CD. In the UV Property section click the New button and chose Planar XZ. Next, Click the Edit button in the Clip section. Scroll down to the Time Control, switch to the Extrapolation Tab and set the Extrapolation After Hold to 100. Step 3
The footprints
From the Modify > Deform menu chose Push. Set the amplitude -0.2 and click the connection icon. Chose Connect and pick the Texture_Map from the explorer. Select the texture support in any viewport and scale it down and position it where you want to place the footprint. Repeat step 2 and 3 and use the Start Offset under the Time Control tab to offset each footprint in time.
The project files used in this tutorial can be found at:http://www.Redi-Vivus.com/Caffeineabuse/Leaving_Footprints_in_the_Snow.zip
Tuesday, August 5, 2008
Leaving Footprints in the Snow
Posted by Ola Madsen at 10:28 PM
Labels: Animation, Softimage XSI, Tutorial
Subscribe to:
Post Comments (Atom)


3 comments:
Hi
Nice tutorial.
The download link is no longer working, do you still have it?
wow, that's and old tutorial.... but after a lot of digging I've managed to find the old project files. Send me an email and i'll send it to you.
btw, the blog have moved to http://olamadsen.se/ so any new material will be posted there...
Post a Comment